ByJohn A
Roof Lanterns for Flat Roofs: Design, Benefits and Installation Considerations
Flat-roof extensions can create valuable living space, but they may also leave the centre of a room feeling darker than the areas near external walls. Natural light can make a noticeable difference to how comfortable and spacious an interior feels. For homeowners planning a kitchen extension, dining area or garden room, roof lanterns for flat roofs offer a practical way to introduce daylight from above while creating an attractive architectural feature. Choosing the right design requires careful thought about dimensions, glazing, insulation, installation and the overall appearance of the property.
What Is a Roof Lantern?
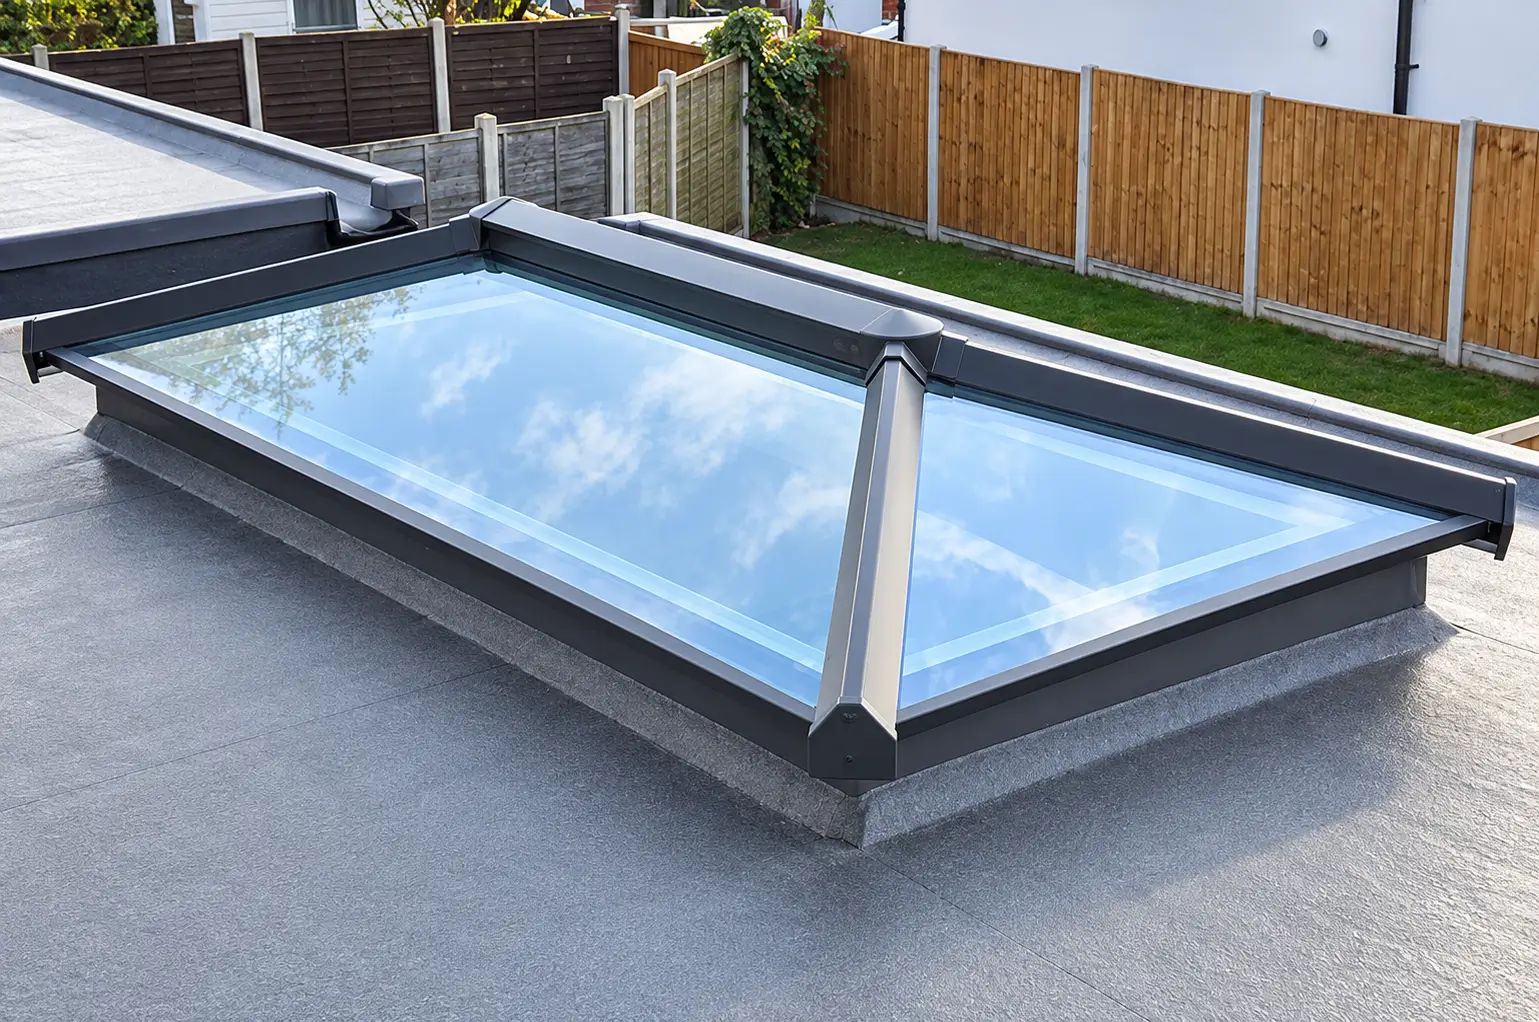
A roof lantern is a glazed structure fitted into a flat or low-pitched roof. It typically features a raised frame with sloping glass panels that meet at a central ridge or along a defined roof structure. This shape allows daylight to enter from several directions, helping illuminate areas that conventional vertical windows may not reach.
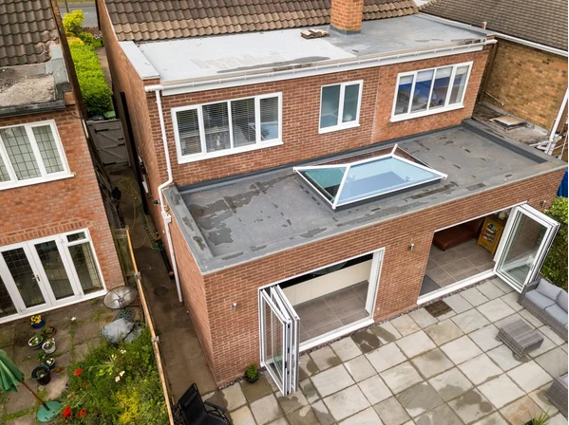
Roof lanterns are commonly installed on single-storey extensions, kitchen diners, conservatories and open-plan living spaces. Their elevated profile can also add visual interest to a relatively simple roofline.
Unlike a standard rooflight, which usually sits closer to the roof surface, a lantern has a more prominent architectural form. The choice between these options depends on the available roof space, ceiling height, preferred appearance and the amount of daylight required.
How Roof Lanterns Improve Natural Light
Daylight entering through a roof opening can reach deeper into a room than light entering through a window on one side. This can be particularly useful in open-plan spaces where cupboards, internal walls and furniture restrict the spread of sunlight.
The raised glazing of a lantern can capture light at different angles throughout the day. The actual result depends on the orientation of the property, nearby buildings, trees, roof dimensions and local weather conditions.
A well-positioned lantern may reduce the need to use artificial lighting during daylight hours. However, the amount of light gained will vary, and excessive direct sunlight can create glare or unwanted heat during warmer months.
For this reason, homeowners should consider the room’s orientation before selecting a product. A south-facing extension may benefit from solar-control glazing or blinds, while a north-facing room may need a design that maximises available daylight.
Choosing the Right Size and Style
The size of a roof lantern should relate to the dimensions and purpose of the room. A small lantern may suit a compact kitchen extension, while a larger open-plan dining and living area might accommodate a wider glazed structure.
Proportion matters as much as the overall size. An oversized unit can dominate a modest room, whereas a lantern that is too small may not deliver the intended visual effect. Positioning the structure above a dining table, kitchen island or central seating area can help establish a natural focal point.
Frame colour and material also influence the finished appearance. Slim aluminium frames are often selected for contemporary properties because they provide a clean profile and allow a generous area of glass. Other finishes may suit traditional homes or extensions designed to complement existing windows and doors.
A flat lantern roof design should also be assessed in relation to the roof’s structural layout, internal ceiling design and external proportions. Checking these details before ordering can help prevent costly alterations during construction.
Glazing, Insulation and Energy Efficiency
Glazing specifications deserve close attention because a roof lantern must balance daylight with thermal performance. Modern double-glazed and triple-glazed options are available, although their suitability depends on the product, budget and requirements of the building.
Look at the manufacturer’s stated thermal transmittance value, commonly expressed as a U-value. A lower U-value generally indicates better insulation, but comparisons should use equivalent measurements and account for the complete product where possible.
Solar-control glass can help limit unwanted solar heat gain, particularly in rooms exposed to strong afternoon sunlight. Low-emissivity coatings and suitable sealed glazing units can also contribute to thermal efficiency.
The frame and installation details matter too. Poorly insulated junctions between the lantern and roof can create cold spots, draughts or condensation. A properly designed upstand, continuous insulation and suitable weatherproofing help reduce these risks.
Homeowners should request product documentation and check that the proposed installation meets the applicable Building Regulations.
Installation and Weatherproofing
A roof lantern needs a sound structural opening and a reliable connection to the surrounding roof. Before installation, a builder should establish whether the existing joists or proposed roof structure can support the unit and whether additional structural work is necessary.
The supporting upstand must be level, correctly sized and compatible with the manufacturer’s installation instructions. Flashing, roof membranes and drainage details must be completed carefully to prevent water entering around the perimeter.
Weatherproofing is particularly important on flat roofs because water drains away more slowly than it does from steeply pitched roofs. The roof should have an appropriate drainage arrangement and fall, designed in accordance with the roofing system and relevant guidance.
Professional installation can help avoid common problems such as leaks, damaged seals, poor alignment and inadequate insulation. Ask the installer to explain the scope of work, product warranty, workmanship cover and maintenance requirements before agreeing to a quotation.
Ventilation, Cleaning and Ongoing Care
Most roof lanterns are fixed, although some products offer opening sections for ventilation. An opening unit may help remove warm air that collects near the ceiling, especially in kitchens and dining areas. It should complement an appropriate ventilation strategy rather than serve as the only means of controlling moisture.
Cleaning requirements depend on the glazing, frame finish, roof accessibility and surrounding environment. External glass may collect dust, pollen, leaves and other debris. Regular visual checks can help identify blocked drainage outlets, damaged seals or signs of water ingress.
Never access a roof lantern or surrounding roof without suitable safety arrangements. Cleaning should follow the manufacturer’s instructions, and repairs to elevated glazing are best handled by a qualified professional.
See also: How Can Lead Generation Help Businesses Attract Qualified Customers?
Planning Permission and Building Regulations
Installing a lantern as part of a home extension may fall within permitted development rights, but this depends on the property’s circumstances, the extension’s dimensions and other restrictions. Listed buildings, conservation areas and properties subject to specific planning conditions may face additional requirements.
Building Regulations can apply to structural safety, energy efficiency, ventilation and other aspects of the installation. A builder or building control professional can clarify the requirements before work begins.
It is sensible to check these matters early, particularly if the project involves altering an existing roof rather than constructing a new extension.
Understanding Costs and Comparing Quotes
The overall cost depends on the lantern’s dimensions, glazing specification, frame material, design, delivery and installation complexity. Structural alterations, roofing work, internal plastering and electrical changes may add to the budget.
When comparing quotations, check that each includes the same product specification and a clear description of the work. Confirm whether VAT, disposal of waste, scaffolding, finishing work and warranties are included. A lower initial price may not represent better value if important installation tasks are excluded.
Ask suppliers for technical drawings and installation guidance before making a final decision. This gives your builder the information needed to prepare the roof opening and supporting structure accurately.
Making an Informed Choice
Well-planned roof glazing can improve daylight, add architectural interest and make an extension more inviting. The best choice depends on the room’s dimensions, orientation, insulation needs, budget and the design of the existing property.
Comparing lantern windows for flat roofs with conventional rooflights can help homeowners understand the differences in appearance, light distribution and cost. Reviewing technical specifications and installation requirements before purchasing also reduces the likelihood of unexpected problems.
A carefully selected lantern, supported by sound construction and effective weatherproofing, can provide lasting value to a home. Taking time to assess the practical details alongside the visual design helps ensure that the finished space is comfortable, bright and suited to everyday use.